
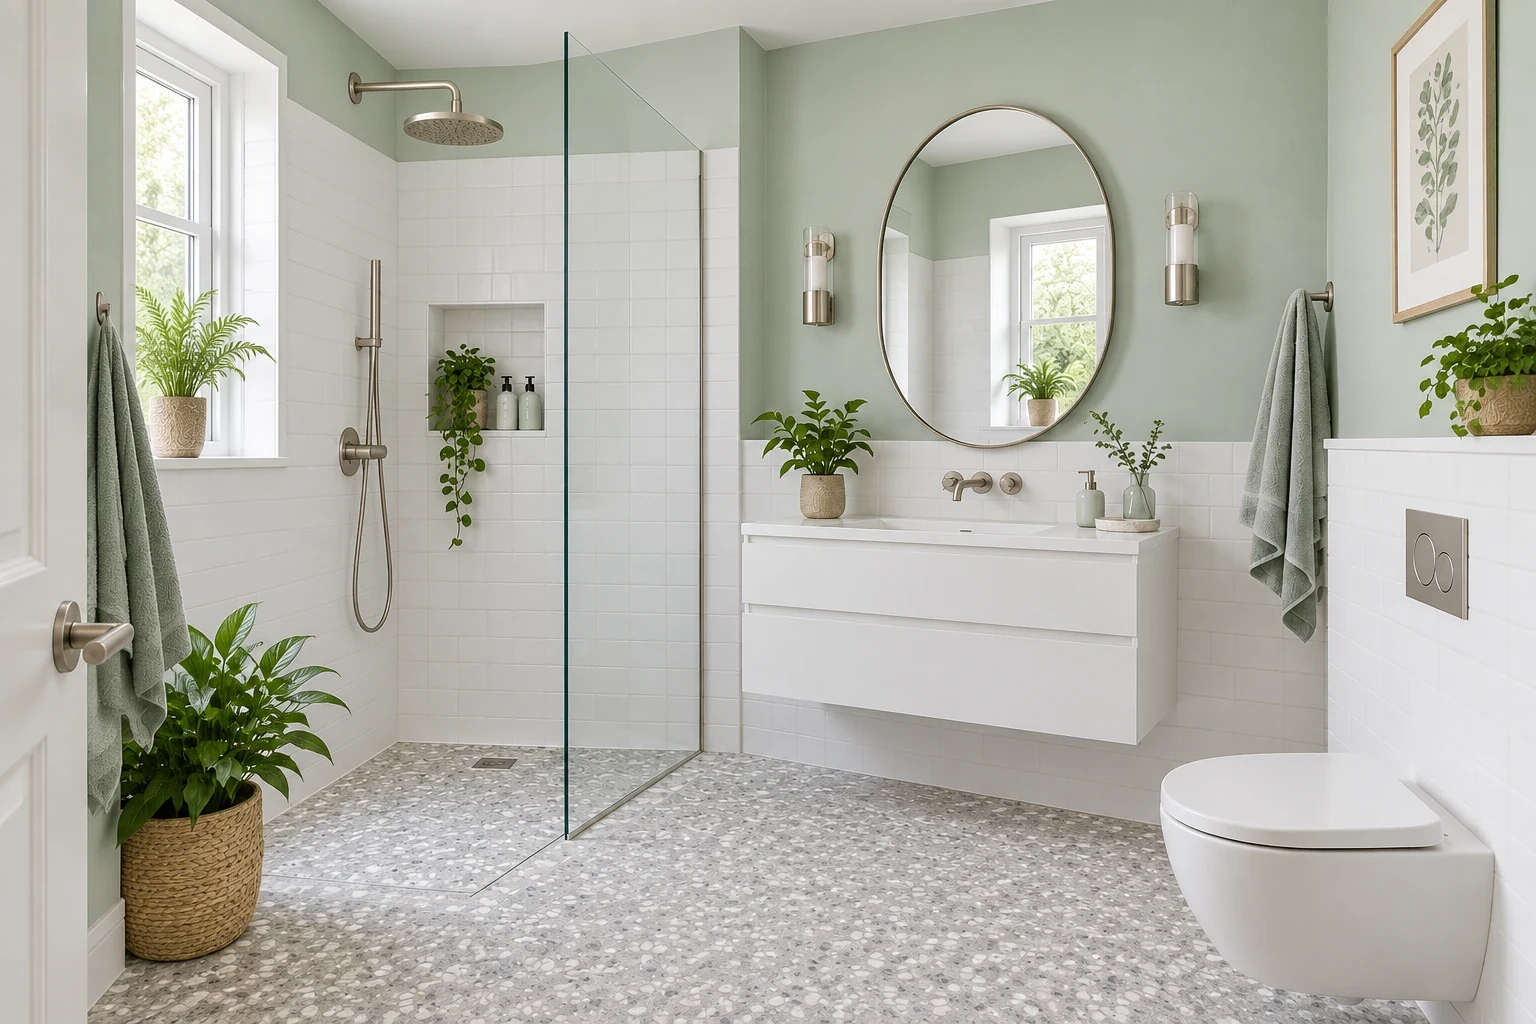
Fitting everyday routines into a tight bathroom often means bumping elbows against bulky cabinets or tripping over the waste basket. These practical updates rely on wall-mounted fixtures, smart tile choices, and transparent barriers to clear up physical and visual room. Sketching top-down floor plan drawings with fixtures and clearances helps map out these changes before you buy a single item.
Add a Glass Screen

Install a clear frameless glass screen instead of a traditional opaque shower curtain, like the setup in the photo. This swap removes visual barriers, allowing daylight from the window to reach every corner of the room without casting dark shadows. Order a custom tempered glass panel that measures at least 3/8 inches thick for stability and safety. Mount it directly to the wall and floor using heavy-duty brushed nickel brackets. Leaving the top open also vents steam much faster than a fully enclosed cubicle.
Try an Oval Mirror

Hang a brushed nickel oval mirror directly above the sink. The curved edges break up the hard, straight lines of the surrounding rectangular tiles and square cabinetry. Choose a mirror that measures roughly 20 by 30 inches to provide plenty of reflection without overlapping the edges of a narrow vanity. Secure it to the drywall using drywall anchors rated for at least 25 pounds. A metallic finish on the frame also reflects bits of ambient light.
Float the Vanity

Mount a white wall-hung vanity cabinet to the wall studs to leave the floor completely clear underneath. Exposing the continuous floor tile gives you extra toe room when standing close to the sink basin. Fasten the cabinet using heavy-duty lag bolts driven directly into the wooden wall framing to support the weight of the countertop. Keep about 10 to 12 inches of open air between the bottom edge of the drawers and the floor.
Lay Terrazzo Tile

Cover the floor with light gray terrazzo tile featuring subtle white flecks. This durable material handles heavy foot traffic and resists water damage while hiding dust and water spots better than a solid dark color. Buy tiles in a standard 12-inch or 24-inch square format to minimize the number of grout lines, which reduces daily cleaning time. Apply a high-quality penetrating sealer over the surface right after installation to block moisture and prevent long-term staining.
Pick a Wall Toilet

Select a white wall-mounted toilet bowl that floats several inches above the floor. Hiding the bulky water tank inside the wall cavity saves up to a foot of precious floor space, giving your knees more clearance. You must install a specialized steel carrier frame inside a standard two-by-four or two-by-six stud wall during the framing phase. This setup leaves the floor entirely open, allowing you to run a mop underneath the bowl in seconds.
Build a Recessed Niche

Frame a recessed shower niche between the wall studs instead of hanging a bulky wire caddy over the showerhead. Pushing storage into the wall cavity keeps shampoo bottles from eating into your elbow room while you wash. Line the back of the cutout with the same light gray terrazzo tile used on the floor to tie the material palette together. Make the opening at least 14 inches tall so it easily accommodates pump-style frosted glass soap dispensers.
Add a High Window

Cut in a high rectangular window with frosted glass on an exterior wall above the shower zone. This placement lets bright natural sunlight flood the painted seafoam green upper walls while maintaining complete privacy from neighbors. Position the bottom sill at least 60 inches above the floor to keep the glass out of the direct splash zone. Use a vinyl or fiberglass window frame rather than wood to prevent rot from daily exposure to heavy shower steam.
Tuck in a Corner Shower

Place a curved glass corner shower enclosure into an underused section of the room. The rounded front profile eliminates sharp ninety-degree angles, creating smoother traffic flow and extra walking space near the doorway. Look for a kit that includes brushed nickel hinges and a matching acrylic base measuring roughly 36 by 36 inches. Sealing the curved track directly to your light gray terrazzo floor ensures water drains properly without leaking into the rest of the bathroom.
Hang a Towel Rail

Use towels and towel rails as decor and function by mounting a sleek brushed nickel heated rack on a bare wall. Drying your folded white bath towel quickly prevents musty odors and keeps the fabric feeling warm for your morning routine. Hardwire the unit to a 120-volt electrical box during your renovation to hide all the ugly power cords. Position the lowest horizontal bar about 36 inches off the floor so you can reach it easily.
Bring in a Potted Fern

Set a small lush green fern in a light gray ceramic pot on the corner of your crisp white vanity counter. Live plants thrive in the high humidity generated by daily showers, bringing a vibrant organic element to a room filled with hard surfaces. Choose a compact variety like a Boston fern or a bird’s nest fern that stays under 12 inches wide. Water the soil thoroughly once a week and let the pot drain completely.
Tile to the Ceiling

Run glossy white subway tiles vertically all the way up to the ceiling behind your brushed nickel shower head. Extending the tile upward provides a continuous waterproof surface that protects the drywall from stray water spray. Stack the rectangular tiles in a straight vertical grid pattern rather than a traditional staggered brick layout for a clean, modern edge. Buy an extra box of tiles to account for cuts around the plumbing fixtures.
Opt for a Pocket Door

Swap a standard swinging entry for a white wooden pocket door that slides away into the adjacent wall. This structural change frees up roughly ten square feet of usable floor space that a regular door needs to swing open. You will need to tear open the drywall to install the metal track and roller hardware inside the framing. Buy a solid core wooden slab rather than a hollow one to block out noise from the hallway.
Install Wall Sconces

Flank your mirror with brushed nickel wall sconces featuring frosted white glass shades. Placing light sources at eye level eliminates the harsh, unflattering shadows that overhead ceiling fixtures cast on your face during grooming. Mount the electrical junction boxes approximately 60 to 65 inches above the finished floor for the best illumination. Equip the fixtures with 3000K LED bulbs to cast a bright, warm glow against the seafoam green paint without generating excess heat.
Stack Folded Towels

Keeping a neat stack of plush white bath towels resting on a light gray floating shelf offers easy access after a shower. Open shelving turns your everyday linens into a hotel-like display while keeping the floor clear of bulky storage cabinets. Anchor the shelf brackets directly into the wall studs using two-inch screws so they can hold heavy, damp cotton safely. Fold the edges of the fabric inward so only the smooth, rounded creases face the room.
Bookmark these tips for your next bathroom remodel, and try swapping your bulky cabinet for a floating vanity first.
