
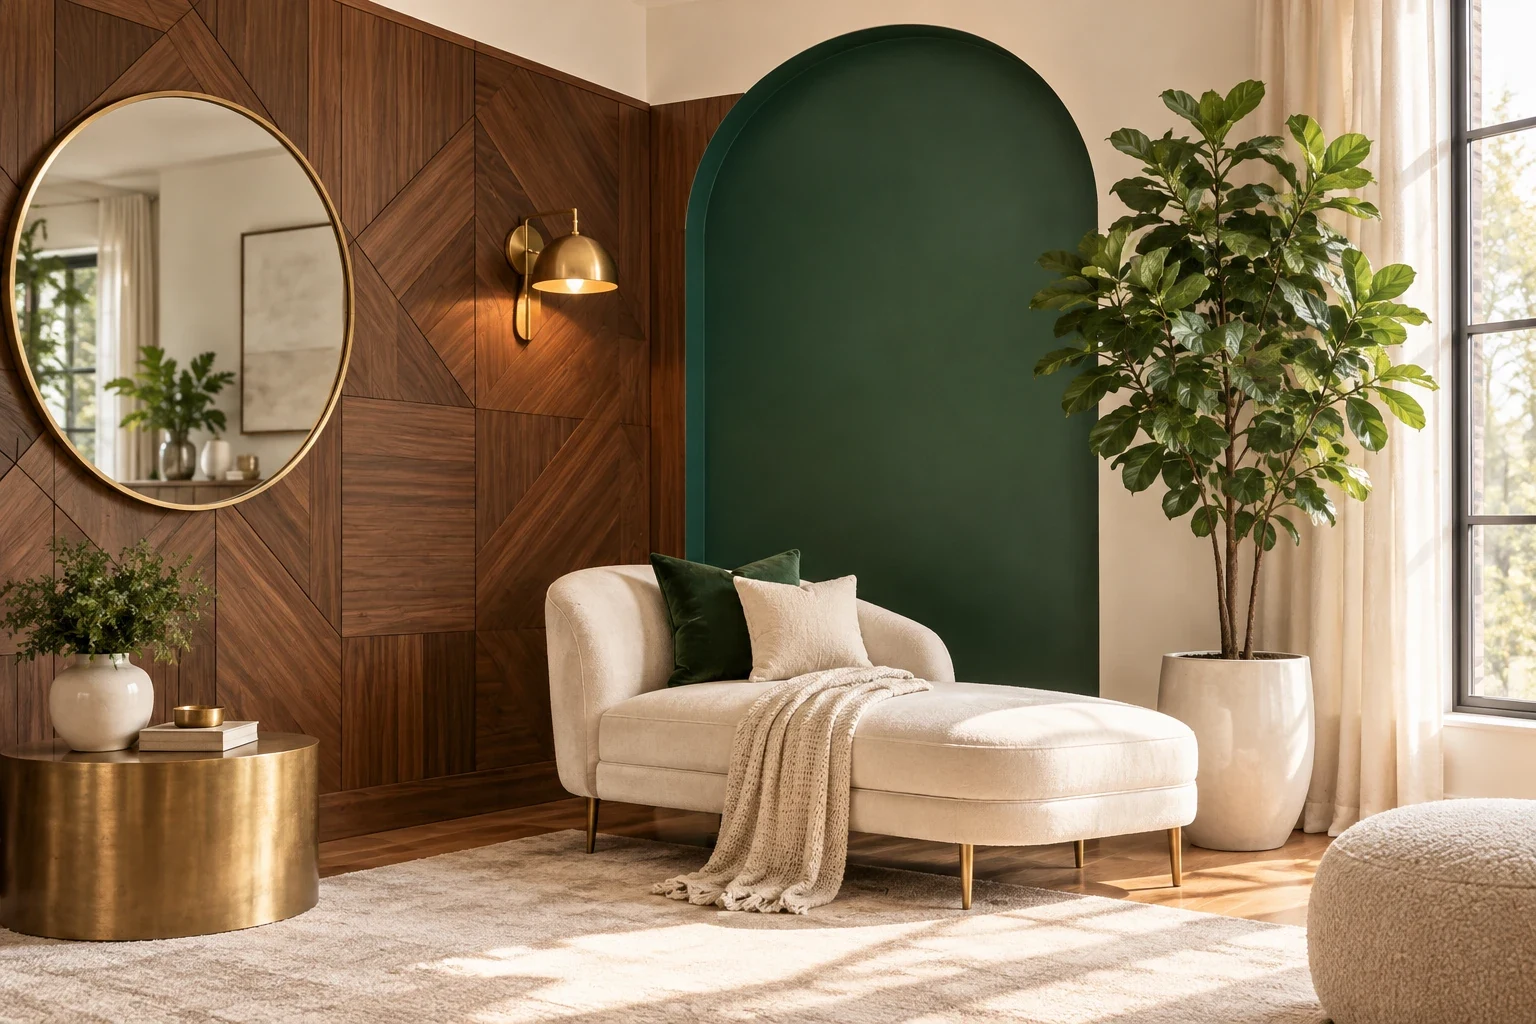
Dividing a reading nook with distinct materials gives the space structure before you even bring in furniture. A backdrop of warm walnut wood and deep emerald paint grounds the seating area against a soft cream wall. The rich colors keep the room from feeling flat while providing a solid framework for brass lighting and large mirrors.
Add Walnut Panels

Cover a blank wall section with geometric walnut panels, like the ones in the photo, to establish a clear focal point. Wood brings immediate warmth to a room while the intersecting lines offer visual interest without requiring framed art. Order pre-cut MDF strips wrapped in walnut veneer, which usually cost around three dollars per linear foot. Attach them to the drywall using construction adhesive and a brad nailer. Leave a tiny gap near the ceiling to accommodate natural expansion throughout the year.
Paint an Arch

Draw a tall emerald green arch directly onto the center wall to frame your seating area. A curved shape breaks up the rigid straight lines of the surrounding wood panels and standard doors. Tie a piece of string to a thumbtack placed in the middle of your desired width, attaching a pencil to the other end to trace a precise half-circle. Use a small angled brush to cut in the curved edge before filling the rest of the shape with a standard roller.
Mount a Sconce

Wire a brushed brass wall sconce straight through your new wood panels. Hardwired lighting frees up floor space that a standing lamp would otherwise occupy, keeping the nook clear for walking. Position the fixture about sixty inches from the floor so the bulb casts a warm glow exactly at reading height. If you want to avoid electrical work, buy a plug-in sconce and run the cord down the corner of the paneling, securing it with small brass staples.
Add a Round Mirror

Hang a large round mirror framed in brass on walnut wood paneling to bounce natural daylight throughout the room. Metallic surfaces catch sunlight, brightening shadowy corners where ambient light falls short while creating visual depth against rich wood tones. Choose a mirror measuring at least thirty inches across to establish clear visual balance against the dark backdrop. Fasten a strong metal D ring hanger directly into a solid wall stud using a sturdy picture hook to support the glass weight safely without damaging the wall.
Pot a Tall Plant

Place a tall leafy ficus plant in a cream ceramic pot right next to your seating area. The organic shape of the leaves softens the rigid corners of the woodwork while bringing a piece of nature indoors. Buy a pot that is two inches wider than the plastic nursery container to allow room for drainage and future growth. Set a plastic saucer inside the ceramic shell to catch excess water, preventing moisture damage to your floors and nearby baseboards.
Uplight with Hidden LEDs

Conceal a warm LED strip behind a floating walnut ledge to cast a soft glow up the painted wall. Indirect lighting reduces harsh shadows and provides gentle illumination for late-night reading sessions. Buy a standard sixteen-foot LED tape kit for under twenty-five dollars and stick it to the back edge of the wood shelf. Route the thin power cable down the corner seam and plug it into a smart outlet, letting you control the brightness from your phone.
Apply Textured Stone

Finish an alcove wall in rough cream stacked stone to contrast heavily against smooth walnut trim. Stone veneer adds rugged physical texture that paint alone cannot achieve, making the wall feel like a structural part of the architecture. Apply premixed mortar to the back of each stone piece using a notched trowel, pressing them firmly against cement backer board. Stagger the vertical joints as you work your way up the wall to mimic the irregular pattern of natural masonry.
Build an Arched Niche

Construct a recessed arched niche in the drywall to display a brushed brass sculpture. A built-in shelf utilizes the empty cavity between wall studs, giving you a display surface without eating into the room’s footprint. Cut the opening exactly fourteen inches wide to fit between standard studs spaced sixteen inches on center. Frame the curved top with flexible plywood, coat the interior with emerald green paint, and slide a custom-cut walnut board into the bottom for the base.
Add Fluted Wood Slats

Install vertical fluted walnut slats over a narrow wall section next to a window seat. The tight, repetitive ridges draw the eye upward, giving the illusion of a higher ceiling while adding a subtle acoustic dampening effect. Purchase pre-made fluted panels in four-foot by eight-foot sheets to speed up the installation process. Measure the height from the baseboard to the ceiling, cut the panels with a circular saw, and secure them using finishing nails every twelve inches along the edges.
Create a Gallery Arrangement

Group a curated cluster of abstract art in brass frames above a walnut side table. A tight gallery arrangement fills a blank cream wall with personality while keeping the individual pieces organized in one specific zone. Trace each frame onto kraft paper, cut out the shapes, and tape them to the wall to test your layout before drilling any holes. Leave exactly two inches of empty space between each frame so the collection looks intentional rather than cluttered.
Hang Woven Wall Decor

Display a large circular woven seagrass hanging against a dark emerald green painted background. Natural fibers stand out sharply against dark colors, introducing a relaxed, tactile element that breaks up hard wooden surfaces. Pick a piece that is at least twenty-four inches in diameter so it does not get lost on a large wall. Drive a single dry-wall anchor into the plaster and use a flat-headed screw to keep the lightweight woven piece flush against the vertical surface.
Frame with Brass Inlay

Set thin brushed brass inlay strips flush into a smooth walnut wall panel to catch passing light. The metallic lines add a subtle geometric detail that upgrades standard flat wood panels without requiring bulky trim pieces. Use a router with a quarter-inch straight bit to carve shallow grooves into the wood before you mount the boards. Apply a thin bead of clear silicone adhesive into the channel, then press the brass strips firmly into place until they sit completely flat.
Mount the TV Flush

Integrate a wall-mounted TV as a focal point by recessing it completely flush inside a custom walnut surround. Sinking the screen into the woodwork hides the ugly plastic side profile and the tangle of messy cables behind it. Build a box frame out of two-by-fours that matches the exact depth of your television bracket, usually around four inches. Leave a half-inch gap around the perimeter of the screen to allow proper ventilation so the electronics do not overheat during use.
Paint a Custom Mural

Adding a hand-painted abstract mural featuring sweeping emerald and cream curves brings movement to a stiff, square room. Large scale murals act as custom wallpaper, filling expansive blank sections for just the cost of a few sample paint pots. Sketch your sweeping lines lightly with chalk, which wipes away clean if you make a mistake. Use a medium synthetic brush to fill in the color blocks, applying two thin coats of latex paint for a solid, opaque finish.
These structured updates suit homeowners who want striking, permanent features rather than loose decor. Combining the geometric walnut panels with a painted arch creates a balanced backdrop that frames your furniture naturally.
