
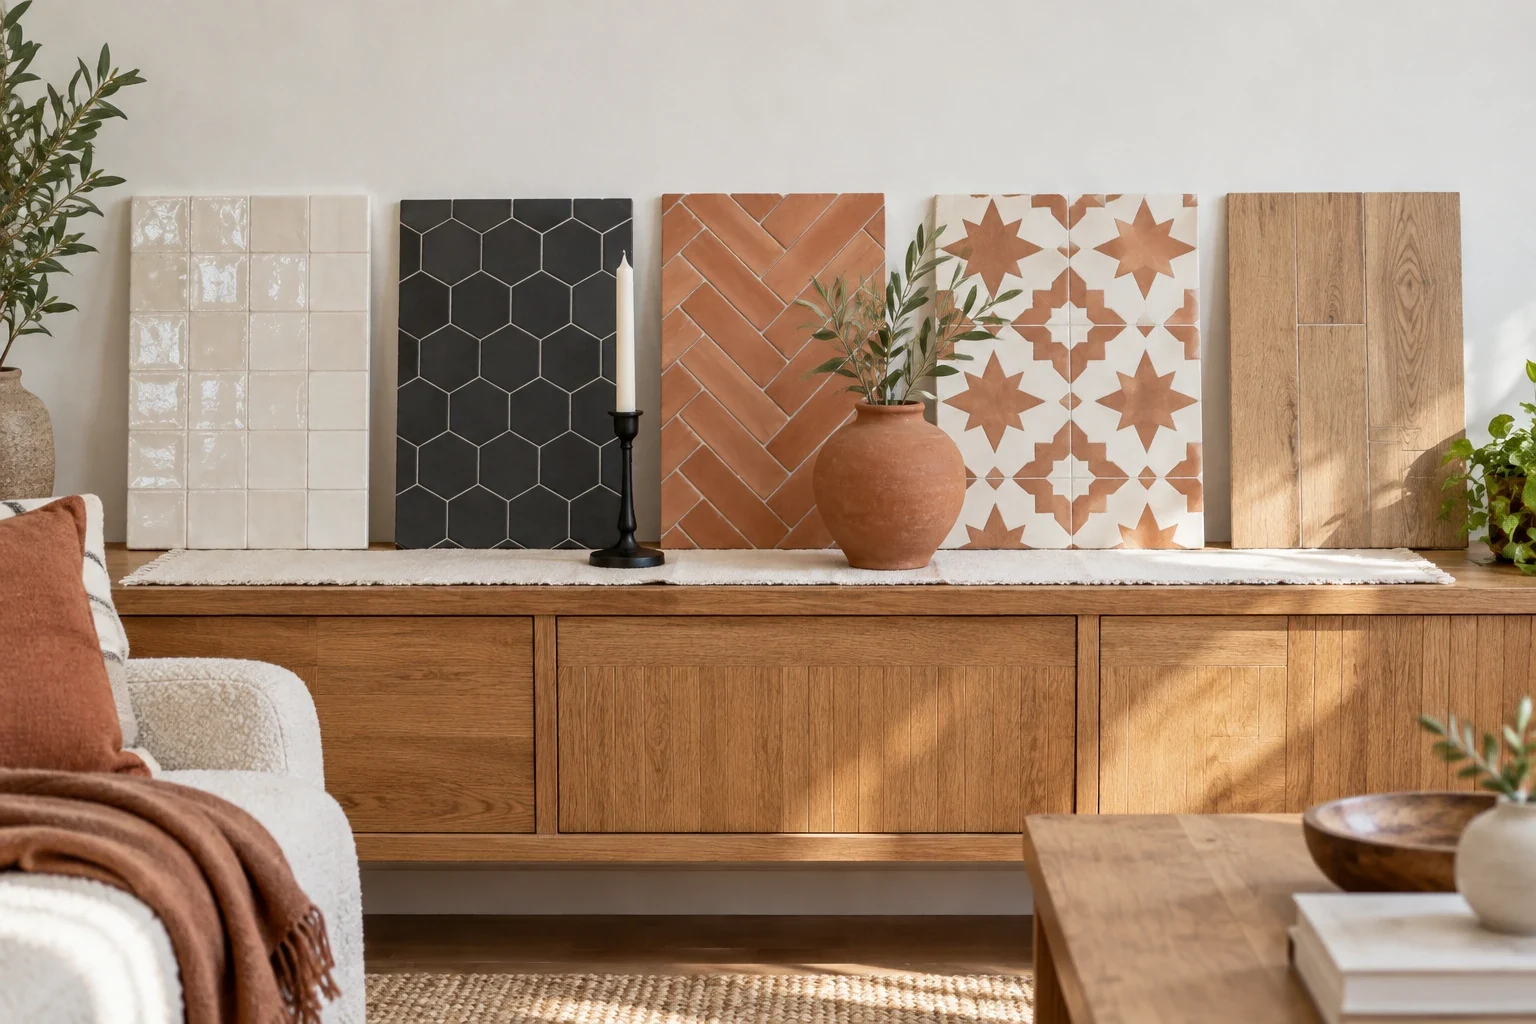
Outdated hearths often clash with modern living room furniture, making the whole wall look dark and heavy. Replacing the surround with a fresh material solves the problem while keeping the structure intact, offering different ways to frame a visible lit fire using durable ceramics, natural stone, and porcelain.
Soft White Zellige

Install glossy soft white zellige squares, like the sample board in the photo, around the firebox for a subtle, textured finish. The handmade variations in the clay catch the ambient room lighting, preventing a solid white wall from looking flat and sterile. Start by measuring the square footage of your surround and adding an extra box for cuts. Hire a professional setter who knows how to wedge these uneven tiles close together without standard grout lines. This material costs around twenty dollars per square foot and requires a special penetrating sealer.
Matte Black Hex

Frame the hearth with matte black hexagon mosaic tiles to ground the room with a dark, solid anchor. This dark finish hides minor ash dust better than lighter colors, making it a practical choice for a wood-burning setup. Buy sheets of one-inch or two-inch porcelain hexagons attached to a mesh backing. Apply a dark charcoal grout to blend the joints, which keeps the geometric pattern from looking too busy next to a visible lit fire. The porcelain surface wipes clean with a standard damp sponge after the embers cool.
Clay Herringbone

Lay thin terracotta brick tiles in a herringbone pattern across the floor pad and up the surrounding wall. This classic zig-zag arrangement adds structural interest to the room while keeping the traditional warmth of baked clay. Find bricks sliced to a half-inch thickness, which fit over existing drywall without needing heavy masonry supports. Use a standard tile saw to cut the forty-five-degree angles required at the borders. Seal the porous clay surface with a matte stone enhancer to protect the terracotta from errant sparks and daily foot traffic.
Patterned Moroccan

Cover a flat living room fireplace surround with a Moroccan star and cross pattern in terracotta and white. This interlocking shape acts as built-in artwork, drawing the eye directly toward the center of the wall. Purchase these cement or clay pieces in matched sets, as the stars and crosses must fit together precisely. Leave a narrow one-eighth-inch grout line to maintain the crisp edges of the geometric design. Apply a heavy-duty masonry sealer before grouting to stop the white sections from absorbing the wet mortar.
Oak-Look Porcelain

Mount warm oak-look porcelain planks vertically above the mantel to mimic the look of natural wood paneling. Porcelain withstands high heat without warping or catching fire, solving the safety issues of putting real timber directly over a heat source. Select planks that measure six inches wide by thirty-six inches long for a realistic board proportion. Stagger the joints randomly rather than lining them up in a strict grid. Use a dark brown grout mixed with a flexible additive to accommodate the slight expansion of the wall behind it.
Glossy Teal Subway

Contrast a soft white mantel and a matte black firebox with a surround clad in glossy teal blue subway tile. The reflective glaze bounces light back into the room, offsetting the dark cavity of the hearth. Pick standard three-by-six-inch ceramic rectangles and run them in a traditional running bond layout. Mix a bright white grout to outline each blue piece clearly against the dark background. This setup costs roughly ten dollars per square foot, offering an affordable way to add a strong block of color to the living area.
Emerald Green Square

Clad the entire floor-to-ceiling family room wall in emerald green square tiles, bisected by a warm oak mantel beam. Taking the material all the way up creates an unbroken vertical line that dominates the room. Source four-inch ceramic squares with a slight color variation to give the large surface a subtle mottled effect. Install the heavy wood mantel by bolting steel brackets directly into the wall studs before laying the tile. Cut the green pieces neatly around the brackets for a tight, flush fit against the timber.
White Marble Chevron

Arrange white marble tiles in a chevron pattern around a matte black insert to update a traditional soft white wall. The sharp, angled cuts of the stone provide a crisp border that contrasts sharply against the dark metal edges of the unit. Buy marble pieces pre-cut into parallelograms on mesh sheets to save hours of manual wet-saw work. Use a premium white thinset mortar, as gray mortar can bleed through the translucent stone and muddy the color. Seal the marble twice to protect it from stray soot marks.
Charcoal Stacked Stone

Build a rustic den fireplace surround using charcoal slate stacked stone beneath a warm oak shelf. The rough, uneven face of the slate adds heavy physical texture that stands up to the visual weight of a visible lit fire. Order boxes of ledger panels, which are six-by-twenty-four-inch blocks of stone already glued together. Apply a thick layer of modified polymer mortar to hold these heavy pieces securely to the cement backer board. Leave out the grout entirely to maintain the dry-stacked, natural appearance of the rugged slate blocks.
Navy Blue Herringbone

Transition the hearth into a warm oak floor using navy blue rectangular tiles arranged in a tight herringbone pattern. This flat floor zone catches falling embers and ash, making a durable porcelain surface essential for safety. Pick tiles measuring two by eight inches to create a dense, repeating V-shape on the ground. Leave a one-quarter-inch expansion gap where the ceramic meets the hardwood flooring. Fill this gap with a color-matched flexible caulk instead of rigid grout to prevent the floorboards from cracking the edge pieces as they expand.
Large-Format Concrete

Finish an open concept living room fireplace with oversized gray concrete-look porcelain tiles. Using massive slabs minimizes the number of visible grout lines, creating a continuous, flat backdrop for the flames. Look for tiles that measure twenty-four by forty-eight inches to cover maximum square footage quickly. Rent a specialized suction-cup handling tool to lift and position these heavy pieces without snapping them. Back-butter each large tile with a half-inch trowel to ensure full mortar coverage and prevent hollow spots behind the heavy porcelain.
Verify the exact clearance requirements for your specific fireplace insert before purchasing any materials. Combustible mantels and surrounding trim always need a minimum distance from the heat source to meet local codes.
