
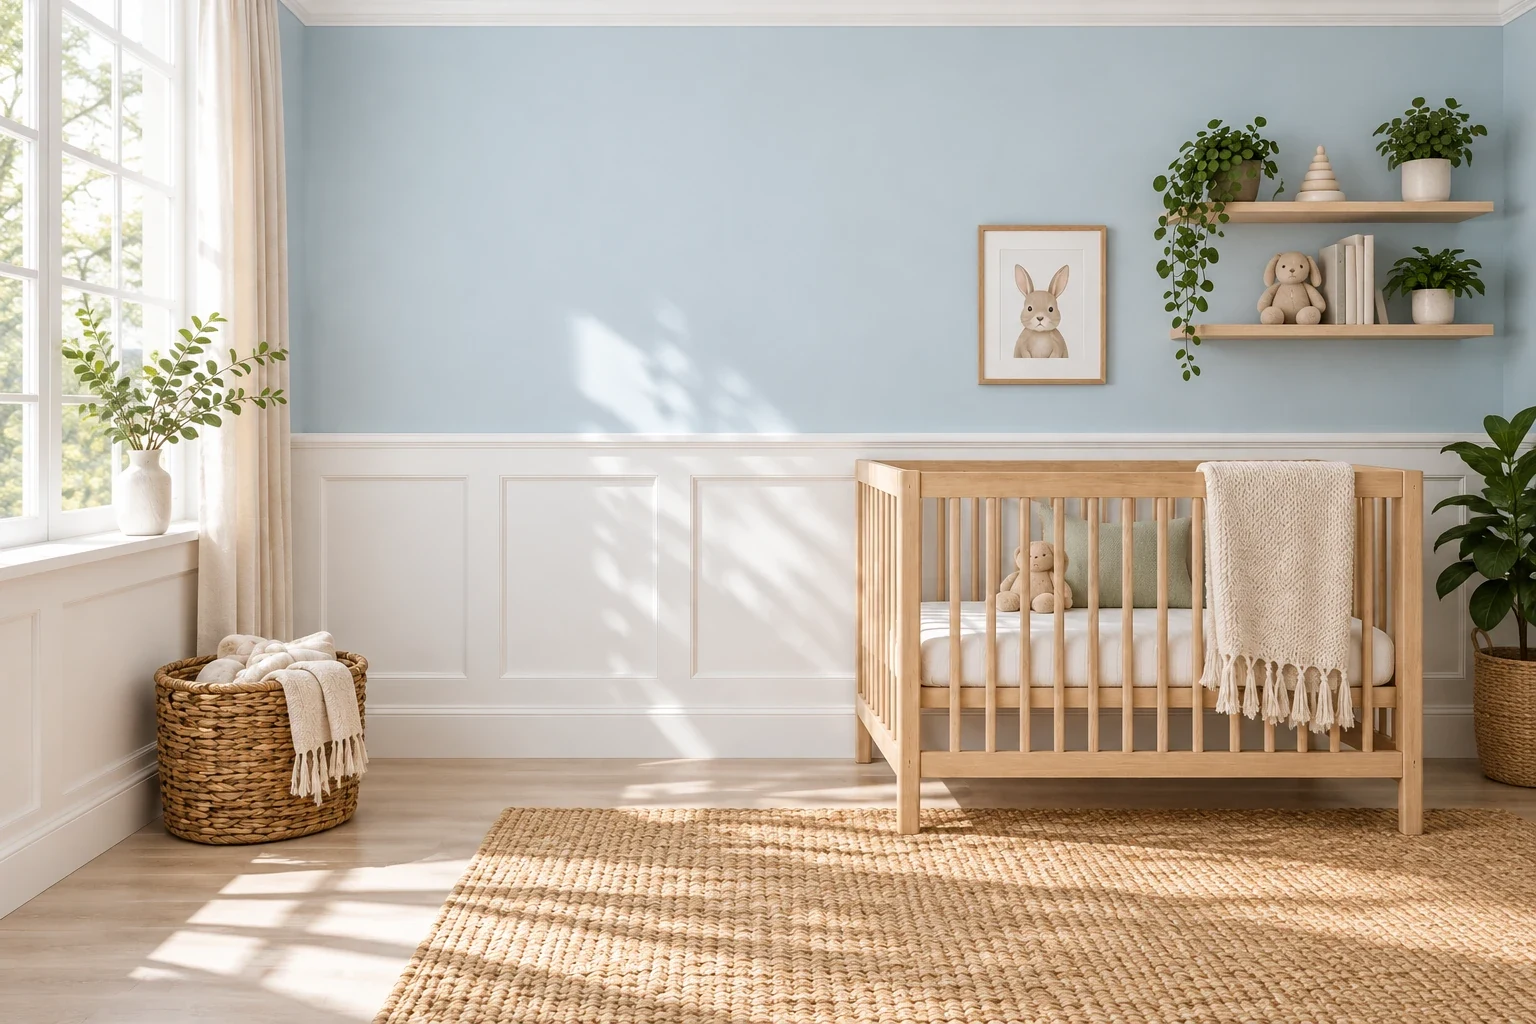
Many parents paint an entire nursery a bright pastel, which often feels too intense once the crib goes in. Keep the heavy color up high by installing white wainscoting on the bottom half of the walls. This grounds the room and gives you a durable surface near the floor.
Paint Upper Wall

Apply a soft blue paint to the drywall above your white wainscoting. Keeping the color on the top half of the room prevents the walls from feeling heavy around the crib. Use a flat or matte finish for the painted area so it absorbs daylight rather than reflecting glare into the nursery. Buy a single gallon of standard interior latex paint to cover the drywall of an average ten by twelve foot room. Roll the paint on with a three eighths inch nap roller for a smooth, even texture.
Add Wall Panels

Install recessed wainscoting panels along the lower portion of the nursery. This classic trim style adds architectural structure to a plain square room and protects the drywall from daily wear. Measure up thirty-six inches from the floor to set your height, which aligns well with standard crib dimensions. Nail one-by-four inch primed pine boards in a grid pattern directly over the drywall to create the recessed boxes. Fill all the nail holes with wood putty and sand them flat before applying your final coat of white trim paint.
Add Cap Molding

Top your wainscoting with a solid wood chair rail. A thick cap molding covers the raw top edge of the paneling and provides a clean transition between the white trim and the blue painted wall. Choose a molding profile that projects at least one inch from the wall so it creates a distinct shadow line. Attach the rail using two-inch finishing nails driven into the wall studs every sixteen inches. Run a thin bead of paintable acrylic caulk along the top seam to block dust from settling behind the boards.
Lay a Woven Rug

Unroll a warm beige woven area rug over your hard flooring. A thick rug dampens sound in a nursery, making it easier to slip out quietly while the baby sleeps. Look for a natural fiber blend like wool or soft jute that measures at least eight by ten feet. Center the rug in the room so the front legs of the crib and any seating rest entirely on the fabric edge. Place a half-inch thick felt pad underneath to prevent slipping and add extra cushion for crawling.
Bring in a Basket

Place a large woven wicker basket right on the floor to hold rolled blankets. Keeping extra bedding in an open bin makes it easy to grab a warm layer during late-night feedings without opening noisy drawers. Select a basket that stands about eighteen inches tall with built-in side handles for easy lifting. Roll standard forty-by-forty inch cotton muslin blankets tightly and stand them upright inside the basket. This arrangement keeps the fabric wrinkle-free and adds a pleasant tactile element against the crisp white wall trim.
Frame Art Above Panels

Hang three matching framed prints side by side directly over the chair rail. Grouping art in a row fills the wide horizontal span of the upper wall without requiring a complicated gallery layout. Buy basic eleven-by-fourteen inch wood frames and space them exactly three inches apart using a ruler. Keep the bottom edge of the frames two inches above the wainscoting cap so the pieces feel anchored to the trim. Use standard picture hooks rated for ten pounds to keep the frames securely fixed to the drywall.
Install Vertical Beadboard

Run vertical beadboard sheets along the lower wall instead of recessed panels. The tight vertical lines draw the eye upward and disguise minor scuffs near the changing station. Purchase four-by-eight foot sheets of primed MDF beadboard, which cost roughly thirty dollars each at a hardware store. Cut the panels to height using a circular saw and secure them to the wall with construction adhesive. Mount a light ash wood floating shelf right above the beadboard cap to hold lotion bottles and wipes within arm’s reach.
Hang a Crystal Chandelier

Swap out a basic flush mount for a statement light fixture above the room. A chandelier specifically adds a layer of gentle sparkle that bounces light across the pale blue upper walls. Choose a fixture that measures roughly eighteen inches wide with small glass or acrylic droplets. Mount the canopy to a reinforced ceiling box capable of holding at least twenty-five pounds. Install fifteen-watt dimmable LED candelabra bulbs to keep the overhead light soft and manageable during the early morning hours.
Paint the Panels Blue

Try colored painted lower-wall paneling by brushing pale blue onto the wood trim instead of the drywall. Flipping the traditional color scheme puts the durable paint finish on the bottom half where a dresser or toy box might rub against it. Leave the upper drywall a soft white to reflect maximum daylight from the windows. Sand the wainscoting lightly with two-hundred-and-twenty grit paper before applying a high-quality satin enamel. Two coats of a water-based alkyd paint will cure to a hard, scuff-resistant shell within a week.
Add a Wood Bench

Push a light ash wood bench against the wainscoting in an empty corner. A low seating area gives adults a spot to sit while watching the baby play on the floor. Pick a bench that measures around forty inches long with a seat height of eighteen inches. Drape a beige woven throw over one end to soften the hard wooden edges and tie into the room’s warm neutral tones. Leave a two-inch gap between the bench back and the crisp white wall panels to prevent accidental paint scratches.
Wrap the Whole Room

Carry the white wainscoting continuously around the entire perimeter of the nursery. Wrapping the room in unbroken trim unifies the space and visually links the entrance door to the windows. Order your baseboards and chair rail in sixteen-foot lengths to minimize visible seams along the longer walls. Cut the outside corners at a precise forty-five degree angle using a power miter saw. Lay your warm beige rug down only after all the trim painting is fully complete to avoid accidental drips on the fibers.
Apply Board and Batten

Build board and batten wainscoting that reaches two-thirds of the way up the wall. Taller paneling shifts the room’s proportions and provides a sturdy backing for heavy shelves in a play corner. Nail vertical one-by-three inch pine strips every twenty-four inches to form the battens. Cap the installation at roughly sixty inches high and mount a light ash wood floating shelf directly onto the top rail. Paint the remaining upper third of the wall pale blue to balance the large expanse of crisp white wood below.
Install the wall panels and chair rail first so you can caulk the seams. Paint the upper walls and trim before bringing in the rug and crib.
