
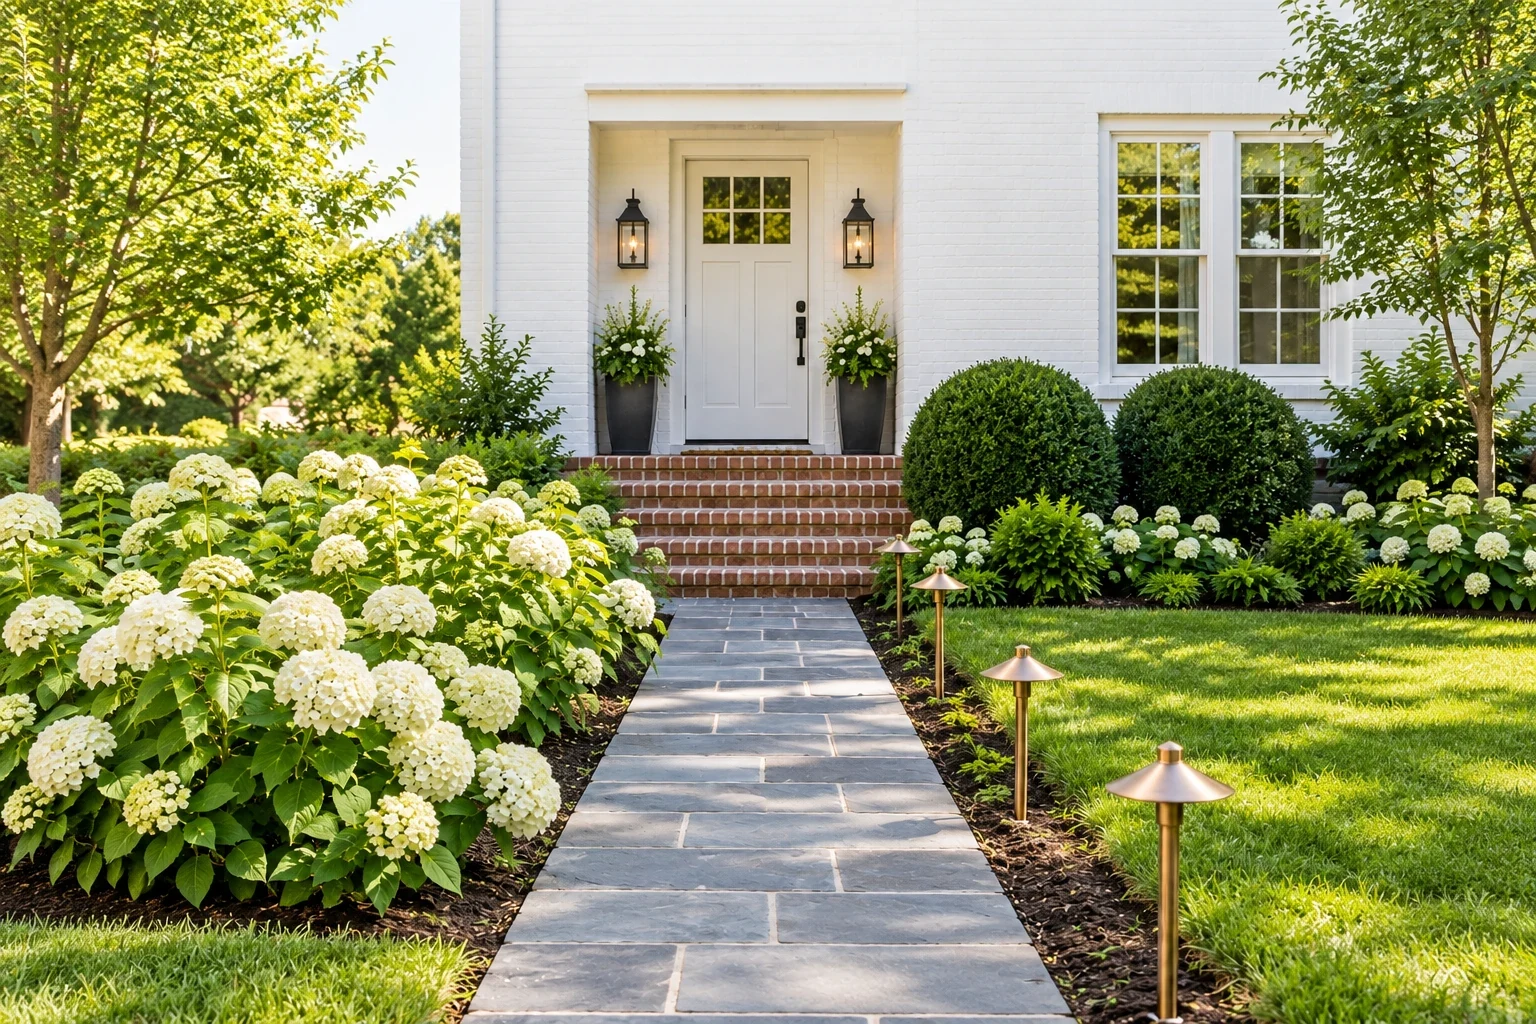
Leaving the path to your front door as a narrow strip of plain poured concrete is a common oversight. Instead, frame the approach with defined borders, textured stone materials, and layered greenery. This strategy separates the foot traffic zone from the lawn while adding clear visual boundaries.
Paint the Door

Coat the front entrance door in a soft white exterior finish to anchor the entire walkway. A pale door pulls visual focus straight up warm brick steps, establishing a sharp focal point that grounds the path. Reflective light colors brighten shaded entryways and prevent recessed structural alcoves from looking dark throughout the afternoon. Sand the existing door casing and panels using 120-grit sandpaper to build a smooth, receptive base. Apply two thorough coats of exterior acrylic paint with a low-nap foam roller to ensure an even texture without visible lap marks.
Plant Boxwoods

Anchor the bottom of your stairs with two perfectly round clipped boxwood shrubs. Symmetrical evergreen planting provides year-round color and establishes a formal, tidy boundary between the hardscape and the garden beds. The dense foliage also hides the rough transition where masonry meets the dirt. Dig a hole twice as wide as the root ball, spacing the center of the plant at least two feet away from the brick steps to allow for future growth.
Add Bright Blooms

Soften the rigid lines of stone by letting lush green foliage and white flowers spill over the path edge. Colorful flower beds along the path break up the heavy look of masonry and make the approach feel established rather than newly built. Low-growing perennials naturally suppress weeds by blocking sunlight from hitting the soil. Plant sweet alyssum or creeping thyme directly behind the border, spacing the starter pots about eight inches apart so they quickly merge into a continuous mound.
Install Low Lights

Place brass low path lights evenly along the walkway to guide footsteps after dark. Illumination prevents tripping hazards on uneven stone while casting a warm glow on the surrounding foliage. Metal fixtures hold up better to rain and accidental kicks than plastic alternatives. Space the stakes roughly six to eight feet apart, alternating sides if the path is wide. Connect them to a low-voltage transformer plugged into an exterior GFCI outlet, burying the main wire three inches deep in the soil.
Lay Dark Mulch

Spread a thick layer of shredded wood around your plantings. Dark mulch beds lining the walkway create a sharp, high-contrast boundary against slate gray pavers. This dark background makes green leaves pop while retaining essential moisture in the soil during hot summer afternoons. Pour bags of dark brown mulch directly over the exposed dirt, spreading it with a hard garden rake to a depth of three inches. Keep the wood chips at least an inch away from plant stems to prevent rot.
Curve the Walkway

Route a winding slate gray stone paver path gently through the yard. A curved walkway forces visitors to slow down and take in the landscape, making a short front yard feel much deeper. The sweeping lines also contrast nicely with the sharp right angles of a traditional house facade. Map out the new shape using a flexible garden hose or marking paint before digging. Excavate the soil to a depth of six inches to accommodate a gravel base and sand leveling layer.
Build Brick Steps

Construct wide stairs using classic masonry to bridge the gap between the path and the porch. Warm brick steps provide a durable, slip-resistant surface that handles heavy daily foot traffic without showing wear. The textured red clay also brings a subtle earthy color that grounds a bright white landing. Lay the bricks in a standard running bond pattern over a solid concrete block core. Use pre-mixed type S mortar, keeping the joints a uniform three-eighths of an inch thick for a tidy finish.
Add White Porch Columns

Support the covered entry roof with thick, soft white pillars. Substantial columns give the front door area a commanding presence and tie into the rest of the house’s exterior trim. They visually frame the landing, turning an open slab into a distinct outdoor room. Slide hollow fiberglass or PVC column wraps over existing structural wooden posts. Secure the top and bottom with galvanized L-brackets, then finish the seams with exterior-grade caulk to keep moisture out of the interior cavity.
Edge with River Rock

Line the perimeter of your path with a neat border of smooth gray and white stones. River rocks separate a slate gray paver walkway from the grass, preventing mud from washing onto the stones during heavy rain. The rounded shapes also offer a pleasing textural contrast to the flat, rigid paving stones. Dig a shallow trench about four inches wide along the path edge. Lay down a strip of commercial weed barrier fabric before filling the trench with two inches of decorative rock.
Lay Stepping Stones

Sink large irregular slate gray flagstones directly into the grass to form a casual secondary route. This method provides a solid surface for side yard access without the expense or labor of pouring a continuous concrete slab. The spaced stones allow rainwater to drain naturally into the ground rather than running off into the street. Place the stones roughly twenty-four inches apart from center to center to match a normal walking stride. Cut the turf around each stone with a spade and remove two inches of soil so they sit flush.
Frame with Manicured Lawn

Maintain a perfectly edged, vibrant green yard right up to the masonry. A manicured lawn framing the walkway highlights the crisp transition between soft grass and hard brick, creating a highly tailored aesthetic. Removing overgrown turf from the path also widens the walking surface, preventing visitors from stepping in wet grass. Use a half-moon manual edger or a gas-powered string trimmer turned vertically to slice away overhanging blades. Clear the debris with a stiff push broom every two weeks during the growing season.
Mix Stone and Brick

Combine large slate gray stone pavers with a ribbon of warm red brick. Mixing materials creates a textured hardscape edge that makes a standard path look like a custom architectural feature. The brick border acts as a visual frame, clearly defining the edge of the walking surface for safety. Set the main stone pieces in a bed of coarse sand first. Then, lay the bordering bricks side-by-side in a soldier course pattern, tapping them level with a heavy rubber mallet to ensure a completely flat surface.
Spreading dark mulch is the fastest project to tackle this weekend. The fresh wood chips quickly clean up the transition between your path and garden beds without any special tools.
