
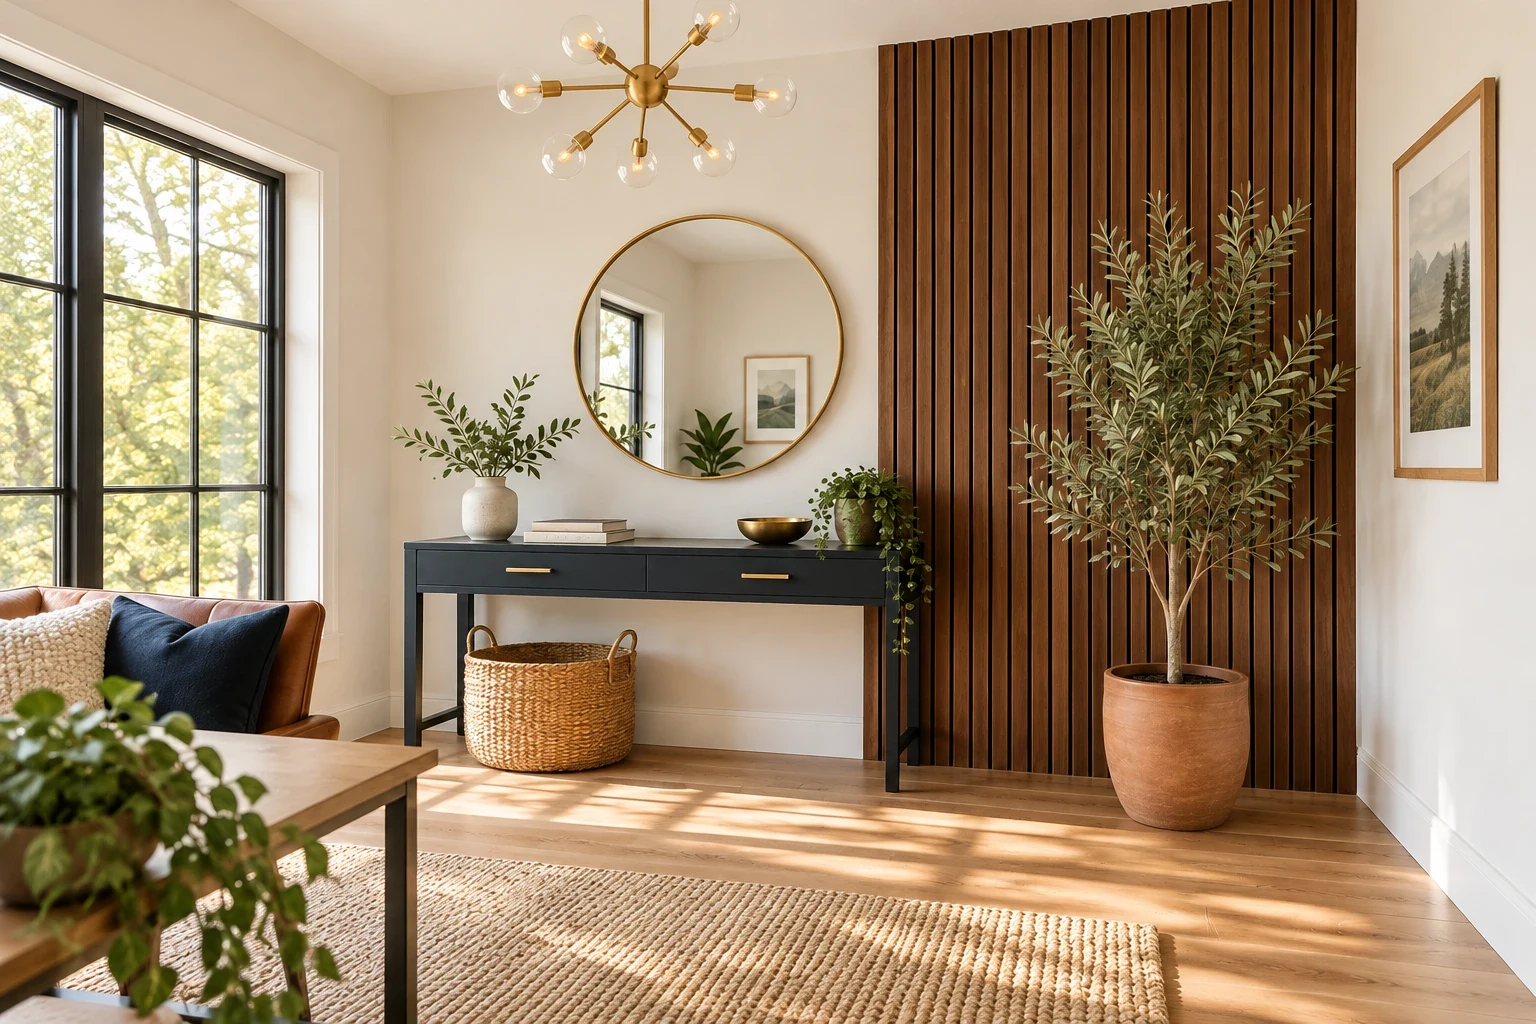
Passing through a long hallway throughout the afternoon requires a surface that handles constant foot traffic while feeling welcoming. Natural light often catches the main passage at sharp angles, making flat drywall look plain and uninspired. Adding structured timber paneling and deep paint tones creates focal points that anchor the passage from morning to night.
Add a Brass Light

Hang a multi-arm brass sputnik pendant directly from the ceiling to anchor the room. The metallic finish reflects natural morning light, breaking up the matte textures of paint and wood. Measure the drop length so the lowest bulb sits at least seven feet above the floor, ensuring clear walking space. Use standard 40-watt equivalent LED bulbs to provide adequate illumination without generating excess heat. This fixture acts as a sharp, structural counterpoint to vertical lines.
Install Wood Slats

Attach vertical warm walnut wood slats to the right side of your wall for a textured focal point. The dark wood tone grounds the space and absorbs harsh echoes in a busy home office. Cut one-by-two inch walnut boards to your ceiling height and secure them with a brad nailer, leaving a half-inch gap between each slat. Paint the wall behind the slats a dark shade first to hide any imperfections and highlight the rich wood grain.
Add a Round Mirror

Mount a round brass-framed mirror above a slim furniture piece to bounce light around the room. A round mirror above furniture softens the rigid vertical lines of the wood slats and the sharp corners of desks or tables. Position the center of the glass about sixty inches from the floor, which aligns with the average standing eye level. Secure the heavy frame using a wall anchor rated for at least thirty pounds to keep the installation safe.
Bring in a Basket

Place a woven seagrass basket directly on the oak floor under the console table. Natural woven fibers introduce a relaxed, tactile element that contrasts with the smooth brass and dark wood finishes. Select a basket measuring at least sixteen inches wide to hold bulky items like extra throw blankets or heavy paper reams. Slide it completely under the table frame so it stays out of the main walking path while remaining accessible during the workday.
Pot an Olive Tree

Set a tall olive tree in a terracotta pot against the wood slats. The muted olive green leaves and the earthy orange clay bring organic color to the warm walnut and navy palette. Fill the bottom third of a twenty-inch terracotta planter with drainage gravel before adding standard indoor potting soil. Water the tree once a week, checking that the soil dries out between waterings to prevent root rot in a climate-controlled room.
Paint the Wall Navy

Coat wood paneling in deep navy blue interior latex paint to anchor a busy passage. Dark navy emphasizes the physical texture of timber grooves while establishing a crisp color boundary against surrounding cream walls and warm oak frames. Apply two full coats using a four inch foam roller to cover vertical seams without leaving lap marks. Allow four hours of drying time between layers so the eggshell finish cures into a durable surface. Use painter tape along the cream wall boundary to keep the paint edges razor sharp.
Apply Geometric Battens

Fasten diagonal wood battens in a raised geometric X pattern across a hallway wall. The repeating angular shapes add architectural interest to an otherwise flat corridor without taking up floor space. Measure and cut one-by-two inch pine strips at forty-five degree angles using a miter saw. Paint the entire wall and the attached battens in a solid charcoal gray flat paint to unify the pattern and mask the nail holes.
Use Reclaimed Planks

Nail weathered gray and brown reclaimed wood planks horizontally across a short mudroom corridor. The rough, varied textures of the old wood hide scuffs and dents in a high-traffic area. Sort your planks by width before starting, stacking boards of the same size together to keep the horizontal rows even. Secure each plank directly into the wall studs using two-inch finishing nails, staggering the vertical seams by at least eight inches for a structurally sound layout.
Style a Wood Console

Set up a console table in entryway vignette arrangements against a dark wood accent wall. The light oak top of the table stands out clearly against the deep background, highlighting whatever objects you place on it. Rest a heavy white ceramic vase on one side of the oak surface to hold tall dried grass. Keep the table depth under twelve inches so the furniture does not block the upper hallway traffic flow.
Install Board and Batten

Fit board-and-batten vertical panels along a narrow foyer passage to guide the eye downward. The raised vertical strips break up the flat drywall while a muted sage green paint adds quiet color to the transition zone. Space the vertical battens exactly sixteen inches apart to align with the standard wall studs behind the drywall. Run a continuous horizontal top rail at fifty-four inches high to cap the panels cleanly before the upper wall begins.
Try Whitewashed Shiplap

Secure horizontal whitewashed wood shiplap across a laundry corridor wall. The pale, translucent white finish brightens the enclosed space while still showing the natural grain of the wood boards. Leave a consistent one-eighth inch gap between each horizontal board using tile spacers during installation. Mount a matte black metal wall sconce directly onto the shiplap, wiring it into a standard electrical junction box to provide focused task lighting in the dark hallway.
Create a Chevron Pattern

Cut warm cedar wood planks into a dynamic chevron pattern that reaches up to a white ceiling. The angled lines draw attention upward, emphasizing the height of an attic hallway. Use a speed square to mark exact thirty-degree angles on the ends of each cedar board before cutting them with a circular saw. Apply a clear, water-based polyurethane sealer to the raw cedar to protect the soft wood from moisture without altering its natural reddish tone.
Mix Wood and Black

Frame a matte black painted accent wall with natural walnut wood trim around the doorway. The stark black paint creates a dramatic void that makes the rich brown tones of the solid wood door and trim appear much warmer. Roll on a flat black latex paint using a three-eighths inch nap roller to achieve a smooth, non-reflective finish. Cut the walnut trim to size and attach it with finishing nails, leaving the wood unpainted to highlight its grain.
Plan with Material Swatches

Gathering material samples on the floor helps you verify color combinations before buying bulk supplies. Seeing navy blue paint swatches next to a walnut wood slat and a brass cabinet pull confirms that the cool and warm tones balance each other. Lay out your physical samples on a cream wool rug in the actual hallway where they will be installed. Leave the pieces there for a full day to observe how the changing natural light affects the finishes.
Frame the Accent Wall

Build a crisp architectural border around a dark teal painted accent wall using thick, natural oak wood trim. The continuous oak frame separates the deep teal color from the soft cream ceiling, giving the bedroom corridor a finished, deliberate look. Purchase one-by-four inch solid oak boards and miter the corners at forty-five degrees for tight joints. Fasten the heavy trim pieces directly into the perimeter wall framing using two-and-a-half inch wood screws.
Secure all wooden planks and finish paint coats prior to mounting hardware. Position secondary items like mirrors, wall sconces, and decorative consoles once the construction dust clears.
